Simplify: Puttin’ On My Face

Is it just me or does anyone else’s make-up drawer, bag, or entiiiiire bathroom look like this??

It’s like I woke up one day and I had cosmetics everywhere….in my purse, both bathrooms upstairs and downstairs, my dresser drawer, my car, and even in my office drawers at work! How many products does one girl need? 

Well, that was a question I was about to ask myself.

Most people don’t think about this, but make-up can be a source of bacteria if it is kept long enough. We do so much to prevent bacterial growth in our homes, we are encouraged to wash our hands 24/7, when somebody around us is sick we try to keep distance to hopefully keep ourselves well. But what about the makeup that we’ve been keeping around for who knows how long?!?

Beyond the powdery cosmetic-ness it probably looks more like THIS!

Gross Gross Gross!!!

So this is where  part two of my spring cleaning happened.

My personal secret to reeeeaaallllly deep cleaning is asking myself some key questions. Here are several that I tend to ask myself….

1. How long has it been since you’ve used that?

2. Do you love it?

3. Would you remember you had that if you weren’t looking at it right this second?

4. Can you do without it?

5. Is it worth moving to the next place?

and this is the one I most commonly ask myself….

6. Is it worth dusting around?

And as you’ve already guessed, when I really think about the answers to these questions, it really gives me a reality check as to what I really need or use on a daily basis.

So, after going through at least 2 full drawers of cosmetics, I really paired down to products that I both 1)use all the time and love as well as 2)are relatively new.

Wanna see the after? Sure you do…

Thats is IT! After going through 2 drawers of cosmetics, these 9 items are the only things I kept. I have a few lip products in my purse, but essentially this is all of the make-up that I own. To some people this may be crazy, but to me it’s liberating!

So here’s the breakdown…

1. Almay TLC Foundation (buy here)

-I use this lightly underneath my normal powder occasionally for a little extra coverage.

2. Physicians Formula Organic Wear Translucent Powder (buy here)

I have fallen in LOVE with this powder. It is not only healthy for my skin, but it’s also light as a feather and blends better than any other powder I’ve ever used! Oh and you just have to you a smidge to get good coverage.

3. Kirklands Signature Mineral Blush

I’ve had this unopened blush for quite a while now and just recently pulled it out this past January. It really is a great blush. I am a bronzer person usually, but this has totally changed my opinion about blush. It definitely gives you a flush of color without looking old-ladyish or too pinky. Since I am switching to all organic products, I probably won’t buy this again, but I would definitely recommend it if you are looking for an inexpensive, light blush.

4. Physicians Formula Hazel Eyes (buy here)

I recently picked this up with my Ulta coupon. I have started to really love Physicians Formula and this product is no exception. Although I am still on the lookout for an all natural, organic eye shadow this one is hypoallergenic and I am ok with using it until I find an organic one.

5. Ulta Shimmer Eye Shadow Palette

Eye shadow is my weakness when it comes to make-up. I’ve had this palette for about a year(about the time you should start thinking about tossing them), so this one probably won’t be around for much longer…but I really do love it. I kept it because of the darker shades that I haven’t used. As you can see, I’ve just about used the most neutral shades like the bright champagne color, the neutral tan, and even the light violet color. I figured the darker shades could dress up my eye shadow routine in case of a special occasion. I got rid of everything except this palette and the hazel eye palette, so that was my compromise.

Unfortunately Ulta doesn’t make this palette anymore or I’d be all over it.

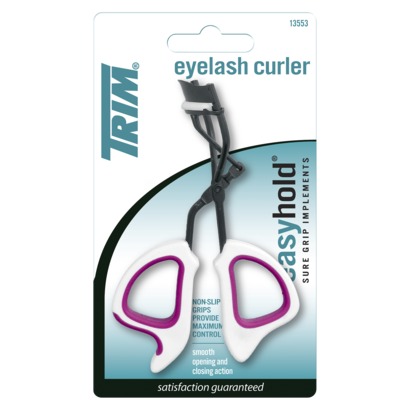
6. Eyelash Curler (buy here)

I probably use one of the cheapest eyelash curlers out there. I like that I can use it and then toss it without feeling bad when I need a new one. I pay around $3 at Target and probably get a new one about every 2-3 months. Nothing fancy here!

7. Define-A-Lash Mascera (buy here)

I have used this mascera for yeeeeaaars. I love it because it never runs, flakes, or smears. I do want to try some organic masceras that I’ve read about, but honestly it’s going to be hard to give this one up. If I could only choose one product, this is the item I would choose out of all my make-up. I also usually but the waterproof formula for extra stay-power.

8. Trim Wide Grip Tweezers (buy here)

I’ve had these tweezers for years and I haven’t found any that I like better. The wide grip is comfortable for my fingers and they are also very affordable at $3.99.

9. EOS Organic Lip Balm (buy here)

This is the most awesome lip balm ever. It is organic as well as gluten-free. It also is probably the softest lip balm I’ve ever used. After trying this, I pretty much gave up all other chap-stick type products. After I’m finished with my make-up routine I use I quick swipe of this just before I run out the door.

And that’s IT! I thought pairing down my makeup routine would be a lot harder than it actually was. Now I know where everything is and I’m not fumbling around in the morning trying to find a specific product.

Has anybody else done this? Do you have a million products in your bathroom? or do you have under 10 like me? or maybe you’ve kept products for years without even once thinking of what might be growing in them! Do tell…

Simplify

Last week was a sad week. I’ve thought a lot about whether I should post this or not, but I decided that it might be good to talk about it during this time of grief and healing for my family. Last Monday morning my dear cousin woke up and decided to take his own life. After receiving the call that he had been found after he committed suicide, my entire family immediately pulled together to make arrangements and support one another.This has literally been one of the hardest things my family has every had to walk through, but if we are anything it is strong. I have an awesome family and something like this just brings out the love we have for one another. I can’t tell you how thankful I am for my family. Something like this tragedy makes me cherish them even more.

As I was getting back into the swing of things this week, I looked over my plans for last week. I have one thing on my to-do list for the month of March…

SPRING CLEANING!!

I usually get the cleaning bug around February & March and this year was no exception. While I routinely clean out annually, this year has been a little bit different. I have been thinking about the concept of living with minimal things. Now, let me preface this by saying, this is easy for some and more difficult for other. It tends to be easy for me because I am not usually emotionally attached to things. I can see what I use on a daily basis and separate those things from things that I am just “hoarding” or “keeping just in case”.

I am a purger my nature, but even I need a reality check at least once a year.

Remember this monster?

Well that sucker was numero uno on my simplify list.

I am the first to admit that I am prone to procrastination, especially when it comes to pesky, little things like this. I initially bought this bin to help me organize my bills and coupons. Well so much for that, looks like it just helped me hoard them and put off opening the envelopes and clipping the coupons. Why is that so hard?!?

So anyways, here’s how I remedied the issue. After going through all of the back-logged coupons and bills, organizing them and throwing away the trash I re-evaluated that needed to stay in the bin.

I pay most of my bills online and do not receive paper statements, but some bills still send me some statements(like my electric bill). I have a file that I keep the last 1 year’s statements in for my records, taxes, etc. The file is upstairs put away, so I keep the bin downstairs so help me have a “home” for the things I need to get to/bills I need to pay.

After an afternoon of clipping, opening, and filing…TADA!

So here’s what made the cut….

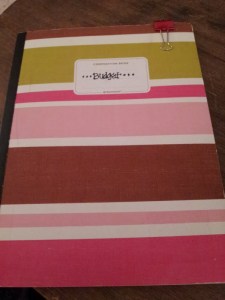
1. My budget notebook

This little gal keeps me in order when it comes to bill amounts, due dates, pay-off amounts, etc. I know this seems freakish to some people, but I am an organized person by nature so, if I can’t write it down then it’s very hard for me to remember. I usually tally everything up bi-weekly or when I get paid.

2. Grocery List

I found this free printable online and it has changed the way I grocery shop. It’s organized by sections or aisles of the grocery store and has lots of fruits/veggies listed. I try to shop the perimeter of the grocery store because it is where you will find the healthiest foods and this printable grocery list really helps because of the amount of detail.

It also has an extra space on the right side where I can list my coupons so I won’t forget to use them while I’m at the store.

Click here to get your own.

3. Post Its & Pens

This may seem like a little thing, but I can allow anything to distract me from getting down to the nitty-gritty of budgeting. Can’t find a pen?….well, who cares! Forget this, I’ll just go do something more fun instead!

4. Bills(obviously)

I try to keep as few as possible coming as paper statements, but there are a few that I still like to look at on paper.

And that’s it!

Simple. To the point. Nothing extra.

That’s exactly what this spring cleaning is about for me.

More to come…

Need More Corbel!

I have a little nook in my upstairs bathroom. I’ve been looking at that little nook for the last 10 months thinking, “How can I make that more interesting and useful?!?”

My answer….Corbels!

Corbels are all over pinterest these days. Most of the corbels I’ve seen are in kitchens, but I thought this would be a great way to add a little interest to my odd little bathroom nook.

all pics via pinterest

Here’s my odd little nook…

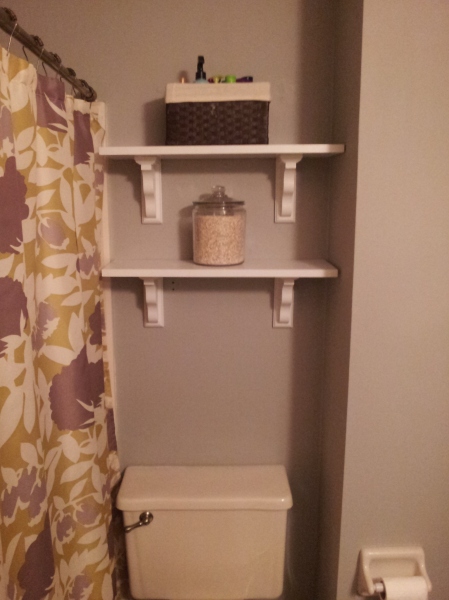
The nook I’m talking about is above the toilet, between the shower and the wall to the right.

Once I decided I wanted to use corbels, I imagined bright white shelves with simple corbels holding them up from underneath.

So off to Lowe’s I went…

Let me explain something. I am a Lowe’s girl. I think it is far superior to Home Depot most of the time. I find that there are usually more knowledgeable employees that are ready and able to help you. Not to mention, I think they have a better selection. I have never had an issue with those two things until the day I took on this project.

 I walked into Lowe’s and immediately went to the woodwork section of the store where I had seen corbels before. Honestly I thought I was in the wrong section because I only saw maybe 2…no, not 2 choices. Literally 2 corbels in the eeeeentiiire store! Whaaaaa?? So off I went to look for a kind, helpful employee to point me in the right direction(preferably to an aise just dedicated to corbels…please? No? Ok.). Nobody, not a soul in site to help. So after walking around for at least another 15 minutes trying to make sure I didn’t miss the jackpot of corbels aisle, I left the store and reluctantly headed to Home Depot.

I usually don’t have very good luck at Home Depot, but this day was different. I wouldn’t say they had a TON of options in the corbel department, but they definitely had more than Lowe’s. Here’s what I found…

Here’s the breakdown…

Option #1- pretty, but a little too ornate for what I wanted. I wanted a little bit more modern, clean lines type of look. It also reminds me of a treble clef…anyone else? just me? ok.

Option #2- I immediately recognized this from John & Sherry Petersik’s kitchen remodel. I would have chosen this one, but it was a little too big for my nook. With four of them in there it probably would have been too much.

Option #3- Honestly I just put this one in there for fun. Yikes and gross all at the same time. It reminds me of the wagon-wheel chandelier that was hanging above the dining room table when my parents first bought their fixer-upper in the 90s.

Option #4- Now we’re talking. It’s a little smaller, has clean lines, subtle curves without being too ornate. Perfect.

So with my corbel choice complete, I headed off to the lumber section. To be completely honest, this section freaks me out a little bit. I never know where to start. There’s a million different types of wood, sizes of planks, finished, unfinished, thick, thin. Luckily for me I received help from a man who seemed like he knew what he was doing(more on that in a minute)…

I needed my shelves to be between 7.5-8 inches deep, 24 inches long, and about 1/2-3/4 inch thick. So Mr. Helpful led me right to a 7.5inch deep/6 foot long Poplar board that was around $7. Perfect. Then he offered to cut the board for me. Awesome….or so I thought…..

I don’t know what happened, maybe the saw was not on high enough, or maybe it was on too high, or even maybe it was the fact that he pushed the wood into the blade and then pulled it back through a second time(imagine me watching in horror with my hands on my face. I don’t know a lot about saws, but I do know it isn’t supposed to sound like THAT!) but when he handed me my  cut pieces they were all chewed up in the ends!

Now I know some people would have asked him to re-cut the boards, but in my head it was free so I didn’t complain. I was slightly freaking out inside though because I knew I was going to paint the board, but they would still show some of the damage that was made by the saw. Grrrrr.

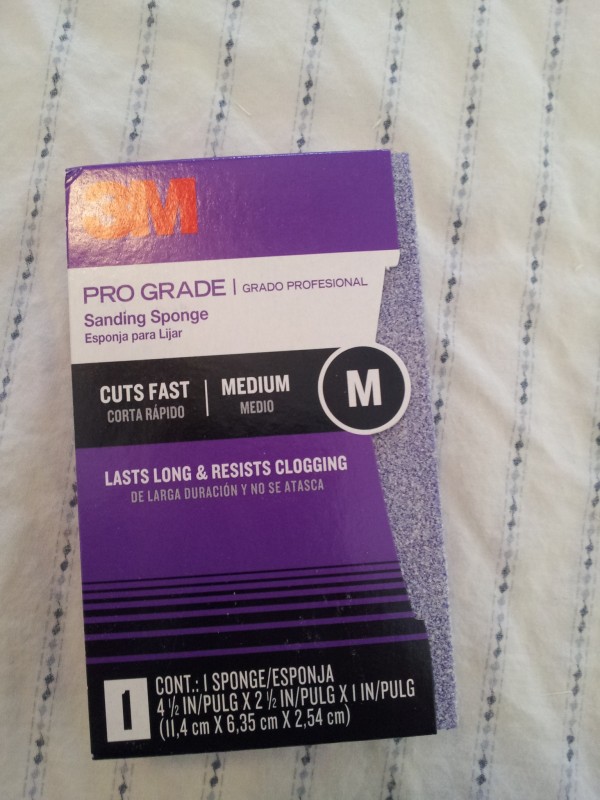
I did pick up a medium grit sanding block to see if that would help smooth the boards’ ends out a little bit.

Sanding the ends of the boards did alleviate most of the issue(it just would have been great to have it cut smoothly the first time. huff puff. Ok, I’m done). You can see the gnawed up end of the board below.

  Normally I would have done this project outside, but it’s been so nasty here and we were expecting rain later that night so I opted to do it on my coffee table in my living room with lost of good ventilation and the fan going. It worked out fine and I didn’t get high from the paint. Whew!

After sanding the fronts and backs of both boards I propped them up on paint cans.

Since this is unfinished wood, it will soak up the paint like a sponge. In this case I always opt to use a coat or 2 of primer before applying the paint. My favorite primer is Bulls-Eye 1-2-3 Water-Based Primer. That stuff is seriously awesome(read more about how I used it here for my dresser makeover).

The great thing about this type of primer is that it dries quickly so you can safely apply several coat within a couple hours without having to worry about it being to thick or gummy. I applied 2 coats and let it sit for a couple hours before I applied any paint. You can also sand this primer in between coats, which is another added bonus.

Here’s the boards after 2 coats. The primer really does help cover and, in my opinion, is definitely worth the extra time and effort to ensure you get a long-lasting finish without any bleed-though from the wood grain or knots in the boards.

I also primed the corbels the exact same way I did the shelves. 2 coats of primer. Let dry for a couple hours. 2 coats of white semi-gloss paint.

Oh, and I almost forgot the most important step…

Make sure you have a curious spotty pup to inspect your work!

So after all the sanding, priming, and painting the splintering on the boards were nearly undetectable on one side, but you could still see some of the damage on the other side.

So my solution was to make sure that these sides became the bottoms of the shelves. Oh well, they aren’t perfect but you won’t be able to see it once they are up on top of the corbels.

I planned on letting all the parts cure for at least 72 hours, but that quickly turned into about a week because life got in the way. How does that always happen??

So finally the other night I decided to put these bad boys up!

The corbels came with anchors and screws to hang them with. I just measured out the desired height of my shelves and marked how far in I wanted my corbels.

Here’s a little trick I learned a while back…. When you have something(like my corbels) that have a bracket on the back that’s a little difficult to hang, just trace your object out on a piece of paper and tape in down to the back of your object. All you have to do is mark your nail holes, then transfer it to the wall and mark the wall. It definitely takes the guessing game out of hanging(or that moment when you’ve hammered your nail in for the 45th time and you think, “Oh my gosh, this better be the right spot!”).


So after I marked everything, I made my pilot holes for my anchors, hammered them into the wall, and used an electric drill to screw the screws into the anchors(leaving about an 1/8 of an inch sticking out to hang the corbels on).

After all the corbels were up, I put my shelves on top and checked to make sure everything was level. I chose to attach the shelves with Liquid Nails because 1)I didn’t want to screw the shelves directly into the corbels and deal with patching, priming, and painting over the holes. and 2)I’ve heard Liquid Nails is pretty much the bomb and it gave me an excuse to try it.

Turns out….Liquid Nail IS awesome!! I just applied a small bead of glue to each corbel and carefully placed my shelves onto them. The package says it sets in 30 minutes and cures in 24 hours. So after I set the shelves on the corbels, I found some heavy items to put on the shelves to kinda help push them down and let the Liquid Nails set overnight.

At first when I stepped back and looked at the finished product I thought they were a little high, but I did that on purpose because you definitely don’t want a concussion when rising from your throne!! I think once I style them with more permanent items it will definitely give a better sense of balance.

Oh and did you notice my booboo? When I measured where I thought I wanted my corbels, it was a liiiiitle too far in underneath the shelves. So I had to jerk those anchors out of the wall and move them. Yay me!

So add patch the holes, sand, and paint to the to do list.

Ok who am I kidding….my oatmeal jar in STILL sitting on those shelves upstairs. I’m just blaming it on wanting to make sure they are completely cured before I style them up with all the stuff that’s going to stay up there. I’m not actually sure what’s going to stay up there, so I’ll save that for another post.

Is anyone else procrastinating this week? Or added corbels to your house recently? Or building more shelving? Or have a spotty pup inspecting all your DIY projects?

What’s for Dinner?

“What’s for Dinner?”

If you don’t have any dinner plans, this question can evoke a sense of panic in anyone!

Well, not tonight! Not this gal! I’ve got plans…and good ones at that!

Chicken Tortilla Soup!

This recipe is an absolute fav at my house. We probably make this at least once a month and it never gets old! That’s how good it really is! Oh, and easy! I can put this together before I head off to work in the morning and it’s ready by the time I get home.

(I originally found this recipe on allrecipes.com, but adapted it to my liking.)

Here’s what you’ll need…

1 can black beans, 1 can yellow corn, 1 can whole tomatoes, 1 can enchilada sauce, 1 can(4 oz) green chilis, fresh garlic, 1 medium/large onion, 1 small bunch of cilantro, 1 pound chicken breast.

Oh and 1 can chicken broth, cumin, chili powder, bay leaves, salt and pepper(not pictured because apparently I’m crazy and forgot to put them in the pic.

The first thing I do is prepare my chicken. You will need to shred this chicken. I start by washing the chicken breasts(I used 2 large breasts from the package pictured above). After I wash and cut any fat off of the edges, I put them into a salted pot of water to boil for about 15 min.

While the chicken is cooking, I chop my onions a garlic.I usually use a whole medium/large onion. It can be a red or yellow onion, that doesn’t matter. I roughly dice the onion and a couple of garlic cloves(usually 2-3) and add them to my dutch oven with a little olive oil to sweat them for a few minutes.

You can use a crockpot for this recipe. I used a crockpot all the time before I got my dutch oven, but I like the way the dutch oven flavors the soup just a tad more than my crockpot used to.

After you sweat the onions and garlic, you’re ready to add the cans or corn, beans, chicken broth, green chilis, enchilada sauce, as well as 2 cups of water.

The whole tomatoes shouldn’t just be added as is. You want them to be sort of shredded and broken up. The way to achieve this is to microwave them on high for about 2 1/2 minutes them smash/shred them with a fork. You don’t want to totally break them up, just start them off and let the cooking process finish them off.

Next come the spices….

1 tsp cumin, 1 tsp chili powder, 1 tsp salt, 1/4 tsp black pepper, and 1 bay leaf(my bay leaves were small so I used 2). Just add those right in.

Next I roughly chop my cilantro and add it to the mix. When I adapted this recipe from the original it called for something like a tablespoon of cilantro. Well, that’s not nearly enough at my place. We loooove cilantro and the subtle minty freshness it adds to mexican-type recipes…so I add nearly the whole bunch! It’s probably about about 1/4 cup if I was to guess.

By the time I chop, open, and add everything my chicken is usually just about done cooking. I then take it out of the pot and let it rest for a few minutes before I get ready to shred it.

I used to shred the chicken by hand with a bowl and 2 forks. It worked just fine….this is until I discovered that my kitchenaid mixer can shred chicken in about 2.5 seconds flat! If you have a kitchenaid and haven’t tried this….you have to! It’s awesome(and yes I was totally geeking out the whole time I was watching it magically shred chicken unattended).

So after your chicken magically shreds itself, just throw that in too!

Then all you have to do is waaaaalk awwaaaay!

 That’s my absolute favorite part about this recipe.If I am at home all day I leave it on the stove to simmer all day. If I’m going to work I get it really hot on the stove and then stick it in the oven on 200-250 degrees for the entire time I’m at work.

When I walk in from work 9 hours later my house smells divine and dinner is ready! TADA!

We always eat this with a little mexican style cheese and an ungodly amount of sour cream and scoop it with tortilla chips. So yummy!

Thursdays are my day off, so this is cooking away on my stove right now. It’s perfect because it gives me time to catch up on laundry, watch some of my DVRd shows and make a Sams run. Oh and one more thing I’ll be catching up on….

Coupon clipping. I have a date with this massive bin this afternoon.

Does anyone else ever do this? I bought a basket to help me organize my coupons and bills, but it apparently did the exact opposite….it helped me stockpile them and procrastinate to the point where we are now in danger of a coupon avalanche! UGH!

At least we’ll have some yummy dinner tonight!

Does anyone else have a yummy chicken tortilla soup recipe? or any favs that you make at least once a month? Or do you stockpile coupons because you can’t bare to throw them away like I do? Share!

Rub-A-Dub-Dub

This weekend my Mom offered to teach me how to make all-natural soap from scratch. It is a tedious and time-consuming process, so needless to say, I was very thankful when she was willing to take the time to do this with me.

The homemade soap making process is basically 2 main elements mixed together to form the soap base.

1) Lye/Water Mixture     2) Fat, usually some type of oil (we used several different types of oil mixed together)

These two elements have to stay separate until they reach the exact same temperature(100 degrees), then you are able to carefully mix them. Lye can cause serious burns if it comes in contact with bare skin. Mixing the lye(powder) with water causes it to heat up and even the fumes can cause minor burns and irritation.

Also, anything that is used to mix, or even touched the lye should only be used for soap making from then on.  Above you can see the lye being measured out on a digital scale and the water is in the plastic tupperware container to the left. The water/lye ratio must be exact for the correct process to take place….hence the digital scale.

After the correct ratio of water to lye is measured, the lye is slowly poured into the water. As you can see, my mom is all gloved/masked up in order to protect herself from the fumes. She’s probably going to kill me for putting this picture up, but she’s beautiful even with her crazy, rigged-with-a-clothespin mask on.

Honestly, it’s kinda scary stuff…

Scary in the science project, it-could-blow-up-or-something kind of way!

While she was working on this part, I was measuring out the oils. We chose to use a combination of olive oil, palm oil, and coconut oils. Everyone knows what olive oil looks like, but most people probably aren’t familiar with palm and coconut oil.

The tall container to the left is the coconut oil. It is solid at room temperature, really oily, and smells just like fresh coconuts(duh!). The larger container to the right is the palm oil. It is also solid at room temperature(as you can see). I combined these two oils and the olive oil into a large stainless steel pot on the stove and slowly began to heat it to 100 degrees.

Once the two mixtures(the oils in the pot & the lye) reached exactly 100 degrees at the same time, we slowly combined them. The chemical process is called saponificationThis forms the base of the soap itself. After this process is complete, we then added our extra elements. That day we were making Oatmeal Lavender soap(this is the same soap I have been using on my face as well as raving about for a few weeks now).

So to form the oatmeal lavender part of the soap we ground up the oatmeal into a powder as well as ground up the lavender flowers. You can see the lavender below. Isn’t it just beautiful?!? And as you probably could imagine, it smeeeellls wonderful as well!

You can see the 2 different powders we poured in. The darker powder is the ground lavender flowers and the lighter is the ground oatmeal.

We also added all-natural lavender essential oil for extra lavender fragrance.

After everything had been added we stirred to combine everything and used a handheld electric immersion blender. Below you can see how, as the oatmeal and lavender becomes incorporated, the soap becomes lighter in color and thicker. You blend this mixture until it becomes thick enough to “trace”. This is a very important part that, if not done correctly, can mess up the entire batch of soap. The “tracing” is where the droplets falling from the blender are able to sit on top. This lets you know that the soap is now thick enough to pour into the molds.

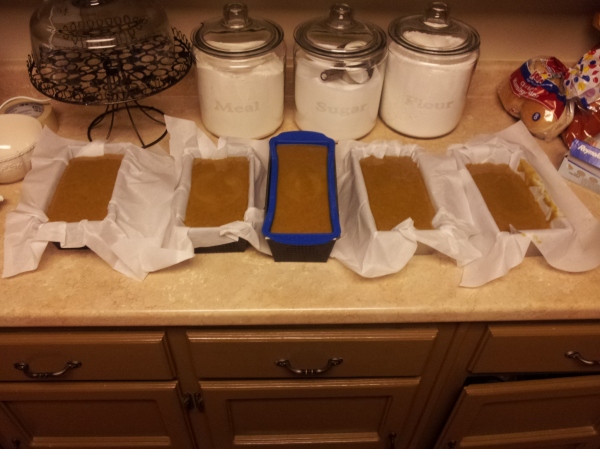
Next, we poured our soap into the molds. My mom usually just uses lined bread pans for this job. She has tried PVC pipes in the past(that makes round soaps), but found that the bread pans are a little easier to handle.

The bread pans are lined with parchment paper, except for the blue mold. That one is a silicone mold that she bought to try out for the soap molding(turns out it works great!). The allows the soap to be easily removed once set as well as keeps the pans from being directly exposed to the lye that is still active in the soap.

After pouring the molds, we covered them with plastic wrap and secured it with a rubber band around the sides of the pans. 

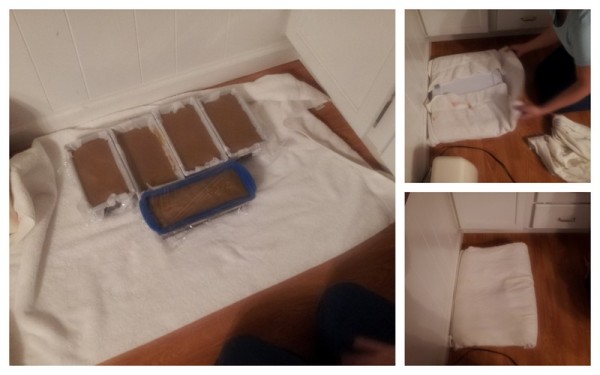
The covered soap has to cool down slowly in order for it to set correctly. The way this is accomplished is by insulating it with a towel on all sides and putting it in an out-of-the-way place for 24 hours.

After 24 hours the soap will be completely cooled and set. After it has set, you can cut the soap into the desired shape and size.

We made the soap on Sunday afternoon so it was completely set by Monday afternoon. I had already gone home by that time, so my mom cut all off the soap into bars once they were ready. All of the bars are all about the same size and shape, but of course they are completely handmade so some of them are bigger or smaller depending on which part of the mold they were cut from. This may bother some people, but I kinda like it because it gives the bars a little bit of character. One other thing you have to keep in mind is that this soap takes 4-6 weeks to completely dry out and be ready to use. The lye in the soap takes that long to become “inactive”(pardon me if I’m not using the correct terminology. That’s just the way I think of it). So now I am anxiously waiting for it to dry so I will be able to bring some home and use it!

So there you have it…..100% natural Lavender Oatmeal soap from start to finish! I absolutely loved the process and I am so thankful that my mom was able to teach me this….so here’s my public shout-out to my dearest mother! “Thanks, Mom! You’re the best!”

Once day when I’m looking back over my life I think this is a skill that I will be so grateful I learned. It’s funny because the first thing I thought of when I was learning this was it could be a good bartering tool if things ever got reeeaaally crappy in this world(ya know, like if we had a nuclear emergency and ran out of household products and things to take care of our families!). I may not be able to defend a colony of people or kill our dinner, but I have soap! It’s got to be worth something, right?!?

So tell me….Has anyone out there ever done/tried to make soap from scratch before? or maybe you think it’s crazy to make soap when you could just go to the nearest store and buy it. Do tell…

Get Your Chowder On!

I recently channeled The Pioneer Woman.

It’s been chilly here lately and when that happens I usually look for a warm, filling soup to make. My favorite thing to do is fill my bowl, put on my fuzzy socks, sink into the couch with my sweetie and catch up on my DVR’d shows(DVR’d is now an acceptable word, right? Yeah I thought so).

My mom recently told me about seeing this recipe on the Pioneer Woman’s new cooking show(Food Network). Immediately I bookmarked the recipe knowing I wanted to save it for the next cold evening in the forecast.

You can follow the link below to read the full details and exact measurements for this recipe. I only made a 1/2 recipe because I do not have an army to feed like Ms. Drummond does(although I’m sure my pups would appreciate a bowl of this as well).

The Pioneer Woman’s Corn & Cheese Chowder

Here are all my ingredients.

 (Ignore the oatmeal container to the right. I assure you I did not add this to the chowder.)

Now before I tell you how delicious this chowder was, let me tell you a little funny story about my corn-purchasing adventure….

The night before I made this we went to the grocery store. It was a Sunday night, the grocery store was packed, and we were both just ready to geeeeet oouuuutta theeeere!! I ran through like a madwoman with my little list. On my list was canned corn, but not just any canned corn. I wanted white corn or sometimes called “shoepeg” corn. I always have plain ole regular canned yellow corn on hand, but I thought the white corn mixed with the yellow would make for a nice combination as well as add a little more sweetness.

If you read the recipe from The Pioneer Woman’s website you’ll notice that she uses fresh corn on the cob. Well, I didn’t see any in my grocery store, so that is why I was trying to mix the white corn in(to keep me from having to run to another store hopefully make it a little more interesting).

So back to the grocery store and my crazy brain

I ran down the canned vegetable aisle and scanned the rows for my trusty shoepeg corn. I found it, buuuuut right next to it was my absolute faaaavorite cheapskate label, “Great Value”. Ah Ha! You see, my favorite Green Giant Shoepeg Corn is a liiiiitle pricey and I needed quite a few cans. So without reading the label, I grabbed a few cans of Great Value White Hominy Corn and ran out the door.

Fast forward to the next day when I was opening my cans to add to my pot. Shoepeg corn is a small kernel that is very light in color and has a sweet flavor. Weeeellll, as I soon found out….White HOMINY corn is NOT! It looks bloated and resembles a slimy little brain, not a cute little sweet kernel! UGH! So much for being a cheapskate! Bloated brain in my chowder was tooootally not what I was going for! I don’t care how good they might taste, it looked nasty!

So back to the recipe!

The first thing I did was cook up my bacon. The recipe says you can do this before adding your other ingredients(which is the way I did it) or you can throw it in to cook as your building the base of your chowder.

I chose to cook it before so I could get rid of most of the cooked-off fat. This isn’t exactly a low-fat recipe, so I thought I’d do what I could to cut calories. I used my dutch oven for this recipe and it worked wonderfully(when doesn’t it work wonderfully though? Dutch ovens are awesome!).

After draining the bacon, I added the diced onions. I didn’t get every last drop of the little bacon remnants out of my dutch oven, so that it would provide some extra flavor to the onions.

While sweating the onions, I set my bacon aside to drain on a papertowel.

After the onions turned slightly transparent, I added in the drained bacon and all of my diced  bell peppers(red, orange, and yellow). Oh, and if you end up making this, spend the extra few cents to get ALL THREE colors of pepper! It makes all the difference in the flavor…plus visually it’s just plain prettier!

The gist of this recipe goes a little something like this……add ingredient. cook. add another ingredient. cook. add anooooother ingredient. and coooooook. So here we go again…

I added my CORN! Yesss, my YELLOW corn. Not my beautiful, sweet shoepeg corn…..all the while kicking myself for being in such a hurry in the grocery store the night before.

Add corn and cook for a few minutes.

Add chicken broth and cook. Sprinkle your flour and cook. By this point, the flour should make your chowder thicker and a little more, well, chowder-like. 

While this was thickening(for about 15 min.) I shredded my cheese, chopped my green onions and measured my half-and-half.

After that, all you have to do is add all that yummy cream, peppery cheese, and crisp onion and let simmer until serving. You want all your cheese and cream incorporated completely before serving.

There you have it….

Cozy bowl of chowder….check!

I ate mine with a few tortilla chips. It definitely added a little but of a crunch that I like with a creamy soup like this one.

Next time I make this recipe I will most likely go the extra mile to get find fresh corn. I think it would add an extra sweetness that canned corn just doesn’t have.

It was still awesome, though! I have already written this recipe down and saved it in my recipe box. Cheese and Corn Chowder will definitely be making another appearance at my house very soon!

Doesn’t this just make you want to put on your cozy PJs, grab a blanket, and sit by a fire with  a warm bowl of this chowder? So yummy!

Gotta Love Burt and His Bees

On my quest to transition my beauty routine to all natural/organic products I started researching the most natural lines that are readily available in places like Ulta and Target. There are a lot of products out there that have labels that contain words like “natural” or “nature ____ (fill in the blank)”, but obviously that doesn’t necessarily mean that they are indeed made from natural ingredients(yeah I know, duh. But you’d be surprise how easily people fall for that stuff).

I already told you before how I recently switched my make-up to Physician’s Formula’s Organic Wear line. It is the absolute best you can buy(as far as organic products go) over-the-counter. There obviously are a lot of other natural products online that you can order, but I found them to be waaaaay more expensive than what I was looking for. But now I had another problem….since the temperatures have been dropping I have had some mild dry skin. Now, before “the switch” I heavily relied on this stuff

Don’t get me wrong, Clinique is great and I loved it for many years. Actually, when I was first starting to wear make-up in highschool my mom took me on a special trip to Clinique inside Macy’s and bought me an entire line of these skincare products.

It’s always a bit overwhelming when you are in the Health/Beauty aisle. With a million little labels staring back at you, sometimes it feel like a million little eyes looking at you! Ekkkk!

So on my quest to find the most natural/readily-available moisturizer I looked at a lot of lines like Neutrogena, Clean & Clear, Almay, and Aveeno. A lot of the lines had products with words like “natural”, “organic”, or “hypoallergenic” on their labels, but none of them were really even made from mostly natural ingredients or had even some ingredients that were truly organic.

Then I found Burt’s Bees. I have used their chapsticks and lip balms for a while now but I had never tried their skincare products. The first moisturizer I tried was Burt’s Bees Radiance Day Lotion with SPF 15 (buy here)

It is 98.2% natural. I know, not 100%, but after researching this product further I found that this is the best you can get in as far as the drugstore brands are concerned. Plus the roughly 1.8% non-natural ingredients are commonly known, somewhat “harmless” ingredients.

Below is a little “pros and cons” list that I made after using this product for about a month now.


PROS

CONS

1. 98.2% natural.

-Better than most all other drugstore brands.

1. Slight Residue

-Even though it is a “day lotion”, I only use it at night because it doesn’t work well underneath my make-up.

2. Lightweight

3. Pleasant fragrance.

4. Price

-At $18 it is comparable to most other good quality moisturizers.


                     The only bad thing I found about this moisturizer was the residue, but I have had that problem with just about every other brand I’ve ever tried. I think this is because I have combination skin and after I put on the moisturizer it doesn’t have enough time to absorb 100% before I apply make-up on top of it. This is also why I chose the “day” formula instead of the night. I probably couldn’t handle the extra moisture in addition to the oil in my natural soap.

All in all I LOVE this moisturizer.

The only thing I missed about my old brand was the thick, creamy texture. Honestly, I think I was addicted to that slathered feeling(you know, that feeling you get after you put on boocoos of creams and potions on your face just before you crawl into bed). Haha! The Burt’s Bees is more like a light coating that goes on thin and dries fairly quickly. Don’t let it fool you though, it moisturizes like the best of ’em!

Another great product in the Burt’s Bees skincare line that I’ve tried recently is the Herbal Blemish Stick (buy here).

My mom tucked this in my stocking this past Christmas and I’ve loved it ever since! I use this just after my soap and just before putting on my moisturizer. It is 100% natural(woohoo!) and dries quickly. This product is designed to treat small areas where you need a little extra help clearing up a blemish. It works like a charm! The first time I was amazed at how quickly it worked. I actually kicked myself that I didn’t take “before and after” pictures, that’s how amazing it was!

The only complaint I have about this product is the strong smell. It smells very medicinal. I was applying this the other day and literally from the other room Nic shouted, “What smells like bug spray?!?” Haha! To be honest, it really doesn’t bother me that much, but I just have to make sure I put it on when I’m by myself. :0)

So if you’re in the market for a new skincare product, you should definitely check out Burt’s Bees. And if you try a product from their line that I haven’t tried yet, let me know how it is!

Has you added a new product to your beauty routine lately? Have an old favorite that you swear by? Do tell…
Thrifting Envy

This past weekend I had my heart set on finding some old, worn nightstands in hopes I could put in a little hard work and elbow grease in to give them new life. By the end of the day Saturday my little head was hung in disappointment.

Let me back up. Ok you see….I have a mom and sister who are literally the thrifting QUEENS! On any given day they will walk in with a cute outfit on and I will say, “Ohhh love that! Where’d ya get it??” and they will say “Oh just Goodwill.” How does that ALWAYS happen? And it’s not just some sorta cute top or generic skirt. It’s always name brand jeans, in-season gap blouses, old navy dresses, etc! For example, this past Sunday my mom walked into church with a gorgeous, perfectly fitted coral top that just complimented her perfectly. Of course, just like always, she found it at a thrift store. I’m convinced they have a hook-up that works at Goodwill and calls them up whenever some snotty, stuck-up lady dumps her trash bags of name brand clothes at the door! Unbelievable….

So there you go…I have thrifting envy. I just admitted it. I want the hook-up! Rewind to this past weekend. I was determined to find my nightstands and haul them home for their awaiting makeover. That did not happen. Not for this gal. Oh no.

First stop was Salvation Army…

In my opinion this store is a bit over-priced, even for a thrift store. It’s newer, so maybe we are paying for the new carpet, etc. Who knows.

There were a few options I found right off the bat.

I like the natural element to this nightstand, but the one thing I know I need is storage…aka drawers! That’s probably the #1 “must-have” on my nightstand wishlist. So I moved on…

This little gal was just down-right cute, but she was just a little too leggy for what I needed. She would be so cute painted mint green and some new vintagy knobs.

There were several problems with this one. First of all, while the other solid wood nightstands were marked $20-30 bucks, this laminate pair was marked $49 each! Whaaa??? I just thought that was ridiculous, but it is a perfect example of things that you find in a thrift store.

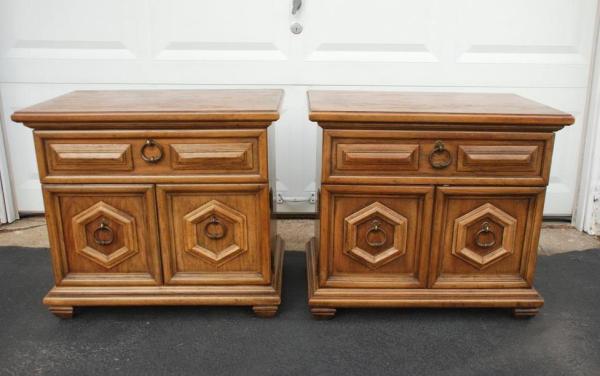
Here’s where things got interesting. Just as I thought I was about to leave I saw this…

Remember this??? It was nearly identical! I was floored. A little oil-rubbed bronze paint for the hardware and a bight new color and I was in business!! I literally jumped up and down in the middle of the store.

Well that is until I realized they only had ONE!!! How could this be?? I looked all over the store, asked every salesperson I could find to no avail. I knew I wanted matching nightstands and that was a must. So reluctantly I walked away.

I did go to quite a few other thrift stores, but someone must have gone before me and bought all the good pieces! Ugh! Oh well. That nearly-to-good-to-be-true nightstand was on my mind all day. I even went back to the store the next day just to find out that it was gone! I was hoping that maybe the other one was just hidden or in the back and they had brought it out. Nope!

So I’m still on the hunt. Oh, and I’ve got a new strategy! Maybe ill take my little sister or my mom with me….like a lucky charm!? Hey, I’m not above resorting to desperate measures!

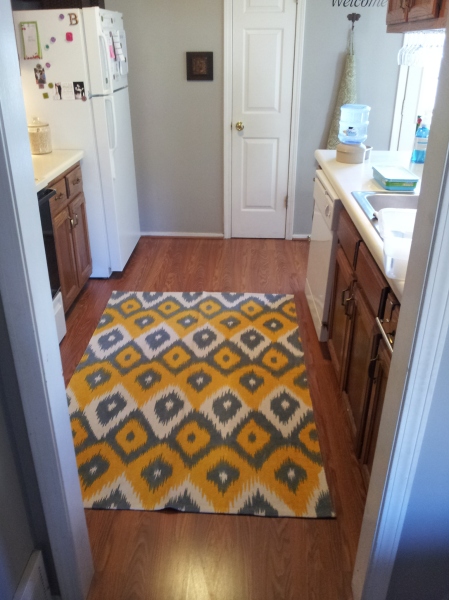
After the not-so-fruitful thrifting trip, I did what any sane girl does, I took my disappointed booty to Marshalls. And what do you know….I found my rug soulmate! I may not be so lucky at thrifting, but I was always can find something at Marshalls(ok, ok I know everyone can…Whatever).

This finding turned my frown upside-down(cheesy, I know)…but it did! I’ve always loved ikat patterns, but I’ve not seen this color combination before. What sold me was that the blue/green is one of the colors that I have in my living room(adjacent to the kitchen) and the yellow is in some of my accent colors downstairs. Now, I am not a matchy-matchy person, but I do think it is important for your rooms to flow. So my new ikat looovah accomplished two things….1. flowed with the rest of the connecting rooms. and 2. provided interest to my boring kitchen(my house is a rental, so please keep in mind that if I owned this house I’d be painting those cabinets a bright white and replacing those beige counters with stone of some sort. Oh and I probably would get matching appliances. Duh).  It was a win-win for everyone. All better.

Does anybody else have thrifting envy? Or are you a “Thrifting Queen” like my mom and little sister? Does anyone else lick their wounds by going to Marshalls? Do tell…

Happy Weekend!

I hope everyone has a great weekend!

Here’s what I’ve got in planned for mine:

A little bit of assisting with this(due to a recent leak. Grrrrr)

And hopefully a lot of this(Yay!)…

Oh and maybe even taking this guy and his sister to the park. What a funny boy!

<a href=”http://www.bloglovin.com/blog/3438393/home-sweet-nest?claim=t4qwwv4ktfq”>Follow my blog with Bloglovin</a>

The Hunt

“We’re going on a bear hunt, we’re going on a bear hunt….”

Ok not really, but I am on the hunt for some nightstands! Honestly, I have never had matching nightstands that I liked. I have either only had room for one, or had mis-matched ones. I am the first one to admit that I usually shut my bedroom door when I have visitors because all my decor energy and funds going towards common areas, not my master bedroom.

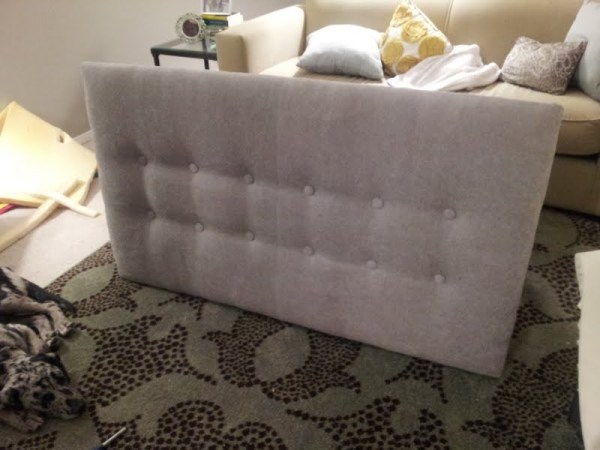
Well that alllll changed when I decided to DIY an upholstered headboard this past summer.

Before I had an antique wooden headboard but it was never was attached to the bed and was always a pain. After finishing this headboard it changed the whole look of the bedroom! The only problem was, after installing the headboard it made my nightstands look soooo puny. I wasn’t planning on keeping the nightstands I had in there anyways, but now I really have to do something about these tiny things.

The ones that are in there now are from Target at about $12 each. When I bought them I knew I wanted more substantial ones eventually.

Usually my favorite stores for home goods are TJ Maxx, Marshalls, and Ikea, but when I saw nightstands there that I liked they were a liiiiiitle too expensive for my thrifty taste!

The gray one below was $49.99 for one. Seriously, that would be $100 for the pair and they aren’t even solid wood!

This one was $79.00 for one. It was solid wood, but it wasn’t exxxxactly what I wanted and after only spending $35 total for my headboard I just can’t justify $160 for a pair of nightstands.

So I decided new just wasn’t the route I wanted to go. So this weekend I will be hitting up every thrift store I can think of looking for old, out-dated, ugly(but solid wood) nightstands that I can re-do. I’m thinking something like this…..

via

These old, forgotten pieces could be painted a fun color and they would look completely different. You could even remove those dated hooks before painting them.

Here’s where I hope to end up after a little elbow grease….

(all above pics via pinterest)

So much better, right?? It’s so amazing what a little paint will do!

Let’s hope I find what I’m looking for…

Anyone else re-doing furniture this weekend? Or on a search for yucky looking furniture at thrift stores? Do tell…

  • Hi! I'm Bretta. This is my blog. Join me in this crazy journey we call life!

  • bloglovin
  • Enter your email address to follow this blog and receive notifications of new posts by email.

  • Wanna know what these two have been up to? Check out the "Millie & Otto" page